


Introduction
Walking into your first yoga class can feel like entering a room where everyone speaks a secret language. You hear terms like "Adho Mukha Svanasana" and see people moving with a rhythm that feels out of reach. We have all been there. At Yoga Design Lab, we believe the mat should be a place of invitation, not intimidation. You do not need to be flexible to start yoga; you simply need to show up. This guide breaks down the essential shapes you will encounter, explaining the "why" and "how" behind each one. We will cover standing, seated, and floor-based postures to help you build a confident, sustainable practice. By the end of this article, the terminology will feel familiar and your body will feel ready to move.
Quick Answer: Beginner yoga focuses on foundational shapes called asanas (postures) that build strength, balance, and flexibility. Key poses include Mountain Pose (Tadasana), Downward-Facing Dog (Adho Mukha Svanasana), and Warrior II (Virabhadrasana II). These poses are designed to be accessible for every body type and can be modified with props.
Understanding the Language of Yoga
Before we dive into the physical shapes, it helps to understand why we use specific names. Most yoga poses are referred to by both an English name and a Sanskrit name. Sanskrit is an ancient language from India, where yoga originated.
Using Sanskrit keeps the practice consistent across the world. Whether you are in New York, London, or Bali, "Tadasana" means the same thing. An asana (ah-sah-nah) literally translates to "seat" or "posture." Originally, yoga was practiced to prepare the body to sit in meditation for long periods. Today, asana practice has evolved into a way to support physical health and mental clarity.
How to Use This Guide
We have organized these poses into categories: standing, floor-based, and restorative. For each pose, you will find:
- The English name and the Sanskrit name.
- A description of the shape and its general focus.
- Step-by-step instructions for your body.
- Modifications for beginners.
For more foundational movement ideas, explore this guide to basic yoga poses for beginners.




Foundational Standing Poses
Standing poses are the "engine room" of a yoga practice. They build heat in the body, strengthen the legs, and help you find your center of gravity.
Mountain Pose (Tadasana)
Tadasana (tah-DAHS-ah-nah) is the blueprint for almost every other standing posture. It looks like you are just standing there, but it is an active, engaged shape.
Step 1: Ground your feet. Stand with your big toes touching and a small space between your heels. If balance feels tricky, move your feet hip-width apart. Lift your toes, spread them wide, and place them back down.
Step 2: Engage your legs. Draw your kneecaps up by tightening your thigh muscles. Imagine pulling energy from the ground up through your arches.
Step 3: Find your spine. Tuck your tailbone slightly to keep your lower back long. Lift your chest and roll your shoulders back and down.
Step 4: Reach through the crown. Imagine a string pulling the top of your head toward the sky. Let your arms rest by your sides with palms facing forward. Breathe deeply.
Warrior II (Virabhadrasana II)
Virabhadrasana II (veer-ah-bah-DRAHS-ah-nah) is a powerful pose that builds stamina and opens the hips.
Step 1: Create a wide stance. Step your feet wide apart on your mat. Turn your right foot toward the front of the mat and your left foot in slightly.
Step 2: Bend the front knee. Exhale and bend your right knee until it is directly over your ankle. Keep your back leg straight and strong.
Step 3: Extend the arms. Reach your arms out to the sides, parallel to the floor. Reach through your fingertips as if someone is pulling your hands in opposite directions.
Step 4: Focus the gaze. Turn your head to look over your front right hand. This focused gaze is called a drishti (drish-tee).
Note: If your front leg starts to shake, that is normal. It means your muscles are working. If you feel pain in the knee, shorten your stance and make sure your knee is not drifting past your toes.
Tree Pose (Vrksasana)
Vrksasana (vrik-SHAH-sah-nah) is the classic balancing pose. It teaches focus and helps strengthen the ankles and calves.
Step 1: Find your base. Start in Mountain Pose. Shift your weight onto your left foot, keeping the leg strong but the knee slightly "soft" (not locked).
Step 2: Place the foot. Pick up your right foot. Place the sole of the foot against your left ankle (like a kickstand), your calf, or your inner thigh.
Step 3: Avoid the knee. Never place your foot directly on the side of your knee joint. This can cause unnecessary pressure on the ligaments.
Step 4: Balance and grow. Bring your hands together at your chest. Once you feel stable, reach your arms overhead like the branches of a tree. Find a non-moving spot on the wall to look at to help with balance.
Triangle Pose (Trikonasana)
Trikonasana (trik-oh-NAHS-ah-nah) focuses on lengthening the sides of the body and stretching the hamstrings (the muscles on the back of your thighs).
Step 1: Set the feet. Start with a wide stance, similar to Warrior II. Keep both legs straight.
Step 2: Hinge at the hip. Reach your front hand forward as far as possible, hinging at the hip joint rather than bending at the waist.
Step 3: Lower and lift. Rest your front hand on your shin, an ankle, or a yoga block. Reach your other arm toward the ceiling. Your body should look like a triangle.
Step 4: Open the chest. Try to keep your torso in line with your front leg. Imagine you are leaning back against a flat wall.
Bottom line: Standing poses are about building a solid foundation. Focus on your feet and your breath before worrying about how "deep" you go into the stretch.
Essential Floor Poses
Moving your practice to the floor allows you to focus on spinal mobility and upper body strength without the challenge of balancing on one leg.
Downward-Facing Dog (Adho Mukha Svanasana)
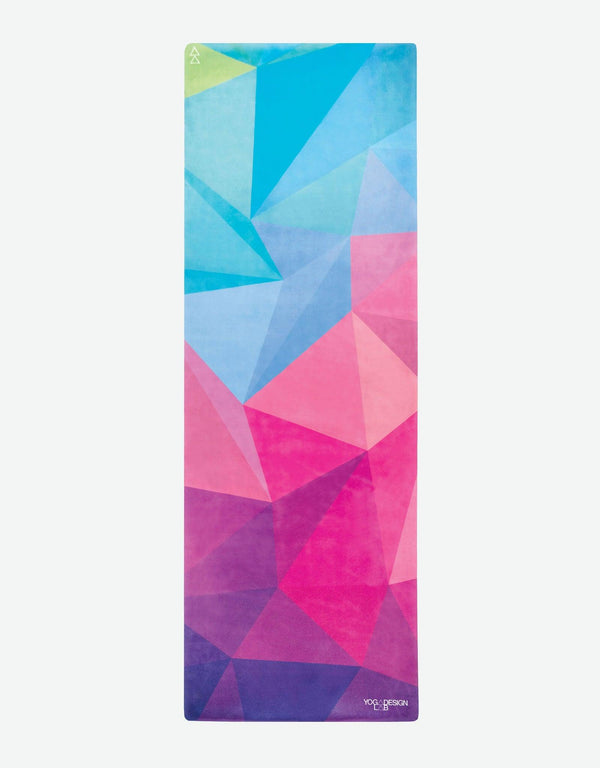
Adho Mukha Svanasana (AH-doh MOO-kah shwan-AHS-ah-nah) is perhaps the most famous yoga pose. It is a full-body stretch that energizes the nervous system. Our Yoga Design Lab Combo Mat is particularly helpful here, as the moisture-activated grip ensures your hands do not slip as you press into the shape.
Step 1: Start on all fours. Place your hands slightly in front of your shoulders. Spread your fingers wide and press into your palms.
Step 2: Lift the hips. Tuck your toes and lift your knees off the mat. Reach your sit-bones toward the sky, forming an inverted "V" shape.
Step 3: Check your back. Keep your spine long. If your lower back rounds, bend your knees deeply. It is more important to have a straight back than straight legs.
Step 4: Relax the neck. Let your head hang heavy between your arms. Look back toward your feet or your navel.
Child’s Pose (Balasana)
Balasana (bah-LAHS-ah-nah) is a resting posture. You can return to this pose at any time during a class if you feel overwhelmed or tired.
Step 1: Kneel on the mat. Sit your hips back toward your heels. Touch your big toes together.
Step 2: Fold forward. Separate your knees slightly and walk your hands forward until your forehead rests on the mat.
Step 3: Rest the arms. You can keep your arms extended forward or tuck them alongside your body with the palms facing up.
Step 4: Breathe into the back. Feel your ribs expand against your thighs with every inhale. This pose gently stretches the hips, thighs, and ankles.
Cat-Cow Pose (Marjaryasana-Bitilasana)
This is a two-part movement used to warm up the spine and coordinate your movement with your breath. It is often the first thing people do in a beginner class.
Step 1: Find a tabletop position. Come to your hands and knees. Make sure your wrists are under your shoulders and your knees are under your hips.
Step 2: Cow Pose (Inhale). As you breathe in, drop your belly toward the mat. Lift your chest and look forward or slightly up.
Step 3: Cat Pose (Exhale). As you breathe out, round your spine toward the ceiling. Tuck your chin toward your chest and pull your belly button in.
Step 4: Repeat the flow. Continue moving between these two shapes for 5 to 10 breaths.
Cobra Pose (Bhujangasana)
Bhujangasana (boo-jang-GAHS-ah-nah) is a gentle backbend. It strengthens the muscles along the spine and opens the chest.
Step 1: Lie on your stomach. Place your palms on the mat next to your ribs. Keep your elbows tucked in close to your body.
Step 2: Press the tops of the feet down. Engage your legs so your knees lift slightly off the mat. Press your pubic bone into the floor.
Step 3: Lift the chest. Using the muscles in your back rather than just pushing with your hands, lift your head and chest. Keep a slight bend in your elbows.
Step 4: Keep the neck long. Look at the floor about a foot in front of you to avoid "crunching" the back of your neck.
Key Takeaway: Floor poses often serve as a reset for the spine. Focus on the relationship between your breath and your movement, especially in transitions like Cat-Cow.
Seated Poses and Twists
Seated poses are excellent for improving flexibility in the hips and hamstrings. They also tend to have a calming effect on the mind.
Easy Pose (Sukhasana)
Sukhasana (soo-KHAHS-ah-nah) is the traditional cross-legged sitting position. While the name implies ease, it can be challenging for those with tight hips.
Step 1: Sit with crossed legs. Cross your shins and let your knees drop toward the floor.
Step 2: Lift your seat. If your knees are much higher than your hips, sit on a Yoga Design Lab Cork Block. This tilts your pelvis forward and takes the strain out of your lower back.
Step 3: Stack your spine. Sit tall, imagining your ears are stacked over your shoulders, and your shoulders are over your hips.
Seated Forward Fold (Paschimottanasana)
Paschimottanasana (pash-ee-moh-tan-AHS-ah-nah) provides a deep stretch for the entire back of the body.
Step 1: Extend your legs. Sit with your legs straight out in front of you. Flex your feet so your toes point toward your face.
Step 2: Lengthen the spine. Inhale and reach your arms overhead.
Step 3: Fold from the hips. Exhale and lean forward. Reach for your shins, ankles, or feet. If your hamstrings are tight, keep a generous bend in your knees.
Step 4: Release the head. Do not worry about touching your toes. Focus on keeping your spine long and letting your breath guide you deeper with every exhale.
Seated Twist (Ardha Matsyendrasana)
Twists help with spinal mobility and can support healthy digestion.
Step 1: Set your base. Sit with your legs extended. Bend your right knee and place your right foot on the outside of your left leg.
Step 2: Hug the knee. Wrap your left arm around your right knee. Place your right hand on the floor behind you for support.
Step 3: Twist on the exhale. Inhale to grow tall. As you exhale, gently twist your torso to the right.
Step 4: Switch sides. Repeat the process on the other side. Always ensure you are sitting upright before starting the twist.
Myth: You have to be flexible to do yoga. Fact: Yoga is the tool you use to become more flexible. Using props like blocks and straps makes every pose accessible regardless of your current range of motion.
The Importance of Props for Beginners
Many beginners feel that using props is "cheating." In reality, props are tools of intelligence. They bring the floor closer to you and help you maintain proper alignment, which prevents injury.
- Blocks: Use these under your hands in Triangle Pose or Downward Dog if the floor feels too far away. They are also great for sitting on during Easy Pose.
- Straps: If you cannot reach your feet in a Seated Forward Fold, loop a yoga strap around your feet and hold onto the ends. This allows you to keep your back straight while still getting a stretch.
- Bolsters: Use a bolster under your knees during restorative poses for extra lower back support.
- The Right Mat: A mat with enough cushion, like our Infinity Mat, can protect your joints during kneeling poses.
For more guidance on choosing support and accessories, explore Yoga Design Lab’s beginner yoga pose guide.
Putting It All Together: A Simple 10-Minute Sequence
If you are practicing at home, you can link these poses together into a simple flow. Hold each pose for 5 deep breaths.
- Mountain Pose: Center yourself and find your breath.
- Cat-Cow: Warm up the spine (5 rounds).
- Downward-Facing Dog: Energize the body.
- Warrior II (Right side): Build strength.
- Warrior II (Left side): Maintain balance.
- Tree Pose: Practice focus.
- Child’s Pose: Rest and reset.
- Seated Twist: Cleanse the spine.
- Corpse Pose (Savasana): Final relaxation.
The Final Integration: Corpse Pose (Savasana)
Savasana (shah-VAHS-ah-nah) is arguably the most important pose in yoga. It is the time when your body and nervous system integrate the work you have done.
Step 1: Lie on your back. Let your legs fall open and your arms rest by your sides with palms facing up.
Step 2: Close your eyes. Relax every muscle, starting from your toes and moving up to your jaw and forehead.
Step 3: Be still. Try to stay in this pose for at least 5 minutes. If your mind wanders, gently bring your focus back to the sensation of your breath.
| Pose Category | Key Benefit | Example Pose |
|---|---|---|
| Standing | Balance and leg strength | Tree Pose |
| Forward Bends | Hamstring flexibility | Seated Forward Fold |
| Backbends | Chest opening and spine strength | Cobra Pose |
| Restorative | Nervous system regulation | Child's Pose |
Conclusion
Starting a yoga practice is a journey of self-discovery. These foundational poses and their Sanskrit names are the building blocks you will use for years to come. Remember that every body is unique; how a pose looks is far less important than how it feels. Focus on your breath, listen to your physical limits, and enjoy the process.
At Yoga Design Lab, we were founded in Bali with the goal of creating gear that makes you excited to step onto your mat. We combine high-performance materials with artful designs and sustainable practices—like using recycled plastic bottles for our Combo Mat. Having a mat that supports your grip and reflects your style can be a wonderful motivator as you begin your practice.
If you are unsure which mat will best support your beginner journey, we recommend exploring our yoga mat collection. It is a simple way to compare options for your specific practice style and environment.
FAQ
Is it okay to do yoga every day as a beginner?
Yes, practicing daily is safe as long as you listen to your body. For beginners, a 15-to-20-minute daily session is often more effective than one long weekly class for building consistency.
Why do yoga teachers use Sanskrit names?
Sanskrit is the traditional language of yoga. Using these names allows practitioners to attend classes anywhere in the world and understand the movements, regardless of the local language.
Do I need to be flexible to start yoga?
No, flexibility is a result of yoga, not a prerequisite. Most people start yoga specifically because they feel stiff or tight in their bodies.
What should I do if a pose feels painful?
Pain is your body's "stop" signal. If you feel sharp or pinching pain, back out of the pose immediately. Try using a prop or asking for a modification to find a version that feels like a "productive stretch" rather than pain.


