


Introduction
The most common reason people avoid trying yoga is the belief that they are not flexible enough to start. You may have seen images of practitioners in advanced asanas (yoga poses) that look more like gymnastics than a wellness practice. At Yoga Design Lab, we believe that if you can breathe, you can do yoga. The practice is not about touching your toes; it is about what you learn on the way down. This article provides a supportive guide for those who feel stiff, tight, or "un-bendy," covering essential poses and the right gear to help you begin. We will explore how to use props to bring the floor to you and how to build a sustainable routine that respects your current range of motion.
The Myth of the Yoga Body
Many people think they need to be flexible before they walk into a studio. This is like thinking you need to be fit before you go to the gym or clean before you take a shower. Flexibility is a result of yoga, not a prerequisite.
Most of us spend our days sitting at desks, driving, or looking at screens. This lifestyle leads to tight hamstrings, closed hips, and rounded shoulders. When you first step onto a mat, your body may feel resistant. This is normal. Yoga is a practice of meeting yourself exactly where you are today.
We focus on "active flexibility." This means using your muscles to support your joints as they move through a range of motion. This approach is safer and more effective than simply "hanging" in a stretch. Over time, your nervous system begins to trust the movement. When the body feels safe, it naturally begins to release tension.
All Yoga Mats




Essential Gear for Inflexible Practitioners
The right tools make a significant difference when you are just starting. If your joints feel sensitive or your hamstrings are tight, the floor can feel very far away. Using high-quality gear provides the stability and comfort you need to focus on your breath instead of your discomfort.
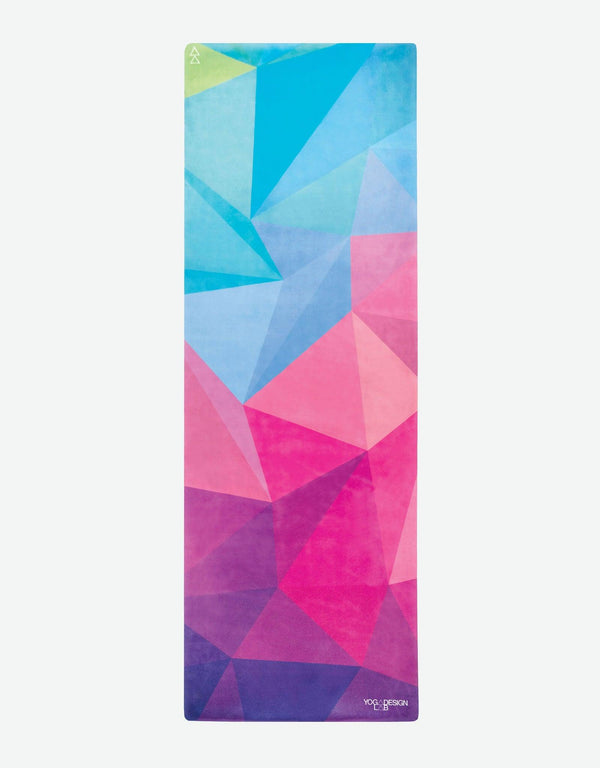
For those who need extra joint support, our Infinity Mat offers premium cushioning. If you find yourself slipping during your practice, the signature Combo Mat provides a moisture-activated grip that actually gets stickier as you sweat. This is particularly helpful for those who move into vinyasa (breath-synchronized movement) or hot yoga styles.
If you are unsure which mat suits your specific needs, we recommend exploring our yoga mat collection. This gives you a way to compare options based on your practice style and floor type. Beyond the mat, props are your best friends. Yoga Blocks and Yoga Straps act as extensions of your limbs, allowing you to maintain proper alignment without straining.
Quick Answer: You do not need to be flexible to start yoga. Poses like Cat-Cow, Child’s Pose, and supported Forward Folds use props to bridge the gap between your body and the floor, allowing you to build mobility at your own pace.
12 Beginner Yoga Poses for Inflexibility
1. Cat-Cow (Marjaryasana-Bitilasana)
This is the perfect way to wake up the spine. It moves the vertebrae through flexion and extension without putting pressure on the hamstrings.
- Step 1: Start on your hands and knees in a tabletop position. Ensure your wrists are under your shoulders and knees are under your hips.
- Step 2: On an inhale, drop your belly toward the mat, lift your chest, and look up slightly. This is Cow Pose.
- Step 3: As you exhale, round your spine toward the ceiling, tucking your chin to your chest and pulling your navel in. This is Cat Pose.
- Modification: If your knees are sensitive, place a folded blanket or a thin towel under them for extra padding.
2. Child’s Pose (Balasana)
This is a restorative pose that gently stretches the lower back, hips, and ankles. It is the "home base" of yoga.
- Step 1: Kneel on the mat with your big toes touching.
- Step 2: Sit back on your heels and separate your knees as wide as the mat.
- Step 3: Fold forward, resting your torso between your thighs and placing your forehead on the mat. Reach your arms forward.
- Modification: If your hips do not reach your heels, place a Yoga Bolster or a pillow between your calves and thighs. If your forehead doesn't reach the floor, rest it on a Yoga Block.
3. Mountain Pose (Tadasana)
While it looks like just standing, this pose builds body awareness and posture. It teaches you how to engage your core and align your spine.
- Step 1: Stand with your feet hip-width apart.
- Step 2: Distribute your weight evenly across the four corners of your feet.
- Step 3: Roll your shoulders back and down, letting your arms hang at your sides with palms facing forward.
- Tip: Imagine a string pulling the crown of your head toward the sky.
4. Standing Forward Fold (Uttanasana)
This is often the most intimidating pose for beginners. The goal is not to touch your toes with straight legs, but to release the back.
- Step 1: From Mountain Pose, hinge at your hips and fold forward.
- Step 2: Bend your knees as much as you need to. Your belly should ideally rest on your thighs.
- Step 3: Let your head hang heavy and grab opposite elbows.
- Modification: Place your hands on two Yoga Blocks set at their highest height. This brings the floor to you and removes the strain from your lower back.
5. Downward-Facing Dog (Adho Mukha Svanasana)
This is a foundational pose that stretches the entire back body. Many beginners struggle with tight calves here.
- Step 1: From tabletop, tuck your toes and lift your hips toward the ceiling.
- Step 2: Keep your knees bent! This is the most important tip for inflexible beginners. A long, straight spine is more important than straight legs.
- Step 3: Press firmly through your palms and fingers.
- Tip: Do not worry if your heels are far from the ground. Many long-time practitioners never touch their heels to the floor.
6. Low Lunge (Anjaneyasana)
Sitting all day tightens the psoas and hip flexors. This pose targets those deep muscles directly.
- Step 1: From Downward Dog, step your right foot forward between your hands.
- Step 2: Lower your left knee to the mat. You may want a blanket under the knee.
- Step 3: Keep your hands on the floor or rest them on your right thigh as you gently sink your hips forward.
- Modification: Use Yoga Blocks under your hands to stay upright and avoid rounding your shoulders.
7. Warrior II (Virabhadrasana II)
This pose builds strength in the legs and opens the hips and chest. It is a great way to build stability.
- Step 1: Stand with your feet wide, about one leg-length apart.
- Step 2: Turn your right toes out 90 degrees and your left toes in slightly.
- Step 3: Bend your right knee until it is over your ankle. Extend your arms out to the sides at shoulder height.
- Tip: Keep your torso centered. Beginners often lean too far forward over the front leg.
8. Tree Pose (Vrksasana)
Balance can be difficult if you feel stiff, but Tree Pose helps build the small stabilizer muscles in the ankles and feet.
- Step 1: Stand in Mountain Pose. Shift your weight to your left foot.
- Step 2: Place the sole of your right foot on your left ankle (as a kickstand), calf, or inner thigh.
- Step 3: Avoid the knee! Pressing your foot into your knee joint can cause injury.
- Modification: Keep one hand on a wall for balance until you feel steady.
9. Cobra Pose (Bhujangasana)
This gentle backbend counters the "slump" of sitting at a computer. It opens the chest and strengthens the muscles along the spine.
- Step 1: Lie on your belly with your hands under your shoulders.
- Step 2: Hug your elbows close to your ribs.
- Step 3: On an inhale, use your back muscles to lift your chest slightly off the floor. Keep your gaze down to protect your neck.
- Note: Do not use your arms to push yourself up high. Focus on the engagement of the back.
10. Butterfly Pose (Baddha Konasana)
This is an excellent stretch for the inner thighs and groin.
- Step 1: Sit on your mat with your knees bent and the soles of your feet touching.
- Step 2: Let your knees fall open to the sides.
- Step 3: Hold your ankles and sit tall. If you feel comfortable, gently fold forward.
- Modification: If your knees are very high off the ground, sit on the edge of a folded blanket or a block. Place blocks under each knee for support so your inner thighs can relax.
11. Reclined Figure Four (Supta Kapotasana)
This is a safer alternative to the "Pigeon Pose" for those with tight hips. It targets the glutes and piriformis.
- Step 1: Lie on your back with your knees bent and feet on the floor.
- Step 2: Cross your right ankle over your left thigh, just above the knee.
- Step 3: If you feel a stretch, stay here. If you need more, lift your left foot and grab the back of your left thigh.
- Tip: Keep your right foot flexed to protect your knee.
12. Legs Up the Wall (Viparita Karani)
This is the ultimate recovery pose. It helps with circulation and calms the nervous system after a practice.
- Step 1: Sit sideways against a wall.
- Step 2: Gently lie back and swing your legs up the wall.
- Step 3: Rest your arms by your sides. Close your eyes and breathe deeply for 5 minutes.
- Modification: Place a folded blanket under your lower back for extra comfort.
| Pose | Target Area | Recommended Prop |
|---|---|---|
| Forward Fold | Hamstrings / Back | Yoga Blocks |
| Child's Pose | Hips / Lower Back | Yoga Bolster |
| Low Lunge | Hip Flexors | Blanket or Blocks |
| Butterfly | Inner Thighs | Blocks under knees |
Key Takeaway: Using props like blocks and straps is not "cheating"; it is a way to ensure you are practicing with integrity and safety. These tools allow you to feel the benefits of a pose even if your muscles are currently tight.
Tips for Building a Sustainable Practice
Consistency Over Duration It is better to practice for 10 minutes every day than for 90 minutes once a week. Frequent, short sessions keep the body mobile and remind the nervous system that these movements are safe. You may find that practicing in the evening helps you unwind, while a morning practice can help clear physical stiffness from sleep.
Respect the "Edge" In yoga, the "edge" is the point where you feel a significant stretch but no pain. If you feel sharp, stabbing, or pinching sensations, back out of the pose immediately. Yoga should feel like a "productive discomfort," never like an injury waiting to happen.
Focus on the Breath If you are holding your breath, your body will stay in a state of tension. Deep, nasal breathing signals to your brain that you are safe. This allows your muscles to relax. If a pose is so intense that you cannot breathe smoothly, you have gone too far.
Celebrate Small Wins Flexibility takes time. You might not touch your toes for months, and that is okay. Notice the smaller changes: perhaps you can stand a little taller, or you find it easier to get out of your car. These "off-the-mat" benefits are the true goal of the practice.
How Yoga Design Lab Supports Your Journey
We were founded in 2014 when our creator, Chad Turner, noticed that most yoga gear was either uninspiring or not built for performance. Our mission is to combine stunning, art-inspired aesthetics with high-performance functionality and sustainable materials.
Whether it is our signature Combo Mat made from recycled plastic bottles or our sustainably harvested Cork Blocks, every piece of gear we create is designed to help you feel excited about rolling out your mat. Learn more about Yoga Design Lab’s sustainability commitment and how thoughtful materials can support your practice. We believe that when your equipment is beautiful and reliable, you are more likely to show up for your practice. Yoga is for every body, and we are here to provide the tools that make your movement feel artful and supported.
Bottom line: Inflexibility is a reason to start yoga, not a reason to avoid it. By using props, focusing on your breath, and choosing supportive gear, you can build a practice that improves your quality of life one breath at a time.
FAQ
Can I do yoga if I can't touch my toes?
Yes, absolutely. Touching your toes is not the goal of yoga. You can use Yoga Blocks to bring the floor closer to you, or simply bend your knees deeply in forward folds to achieve the same benefits for your back and hamstrings.
How often should an inflexible beginner practice?
Consistency is the key to seeing progress. Aim for 3 to 4 short sessions per week, even if they are only 10 or 15 minutes long. Regular movement helps "re-train" your nervous system and muscles to accept a wider range of motion over time.
Which yoga mat is best for someone with stiff joints?
For those seeking extra cushioning and support, the Infinity Mat is an excellent choice due to its thickness and grip. If you prefer a more natural feel with excellent grip, the Cork Mat offers a firm, stable surface that is naturally antimicrobial and moisture-activated.
Do I need to learn the Sanskrit names for the poses?
It is not necessary to memorize the Sanskrit terms to benefit from yoga, but many teachers use them in class. We recommend learning the basic English names first and gradually picking up the Sanskrit terms like Adho Mukha Svanasana (Downward Dog) as you become more comfortable with your routine.


