


Introduction
There is a specific kind of quiet magic that happens when you first unroll a yoga mat. You might feel a mix of excitement and a little bit of uncertainty as you look down at the rectangular space you’ve claimed for yourself. Many of us started our journey right there, wondering exactly what to do once we sat down. It is easy to feel overwhelmed by the thousands of possible postures, but the beauty of yoga lies in its simplicity.
At Yoga Design Lab, we believe that your practice should be as inspiring as it is functional. This guide is designed to take the guesswork out of your first few sessions by providing a clear, accessible sequence of yoga poses for beginners. We will explore how to transition between shapes, how to use props to support your body, and how to build a routine that feels sustainable. By the end of this flow, you will have a foundational understanding of how to move with intention and grace. For more foundational ideas, explore this guide to basic yoga poses for beginners at home.
The Logic of a Yoga Sequence
Before we move into the physical postures, it is helpful to understand why we put them in a certain order. In yoga, we often talk about sequencing as an "arc." We start slowly to ground the mind, build heat to wake up the muscles, and then gradually cool down to integrate the benefits of the movement.
A well-balanced sequence generally follows these four stages:
- Centering and Grounding: Bringing your focus to the present moment and your breath.
- Warming Up: Gently waking up the spine and major joints.
- Standing and Strength: Building stability, balance, and heat.
- Cooling and Rest: Deep stretching and final relaxation.
This structure ensures that your body is physically prepared for more challenging shapes and that your nervous system leaves the mat feeling calm rather than overstimulated.




Setting the Space for Success
Your environment plays a significant role in how you experience your practice. You do not need a dedicated studio room; a quiet corner where you can stretch your arms out wide is enough. Consider lighting a candle or playing soft music if that helps you feel present.
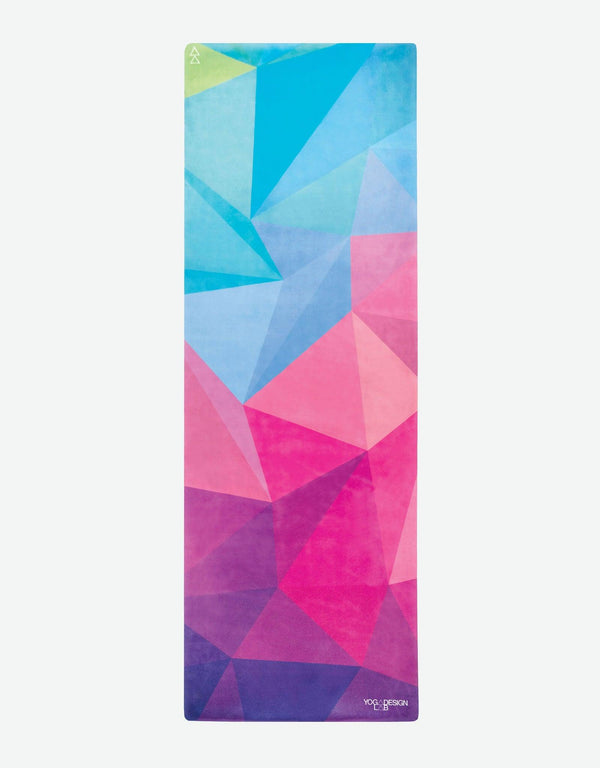
The gear you choose also impacts your confidence. For beginners, the most common challenge is slipping during poses like Downward-Facing Dog. We designed our signature Combo Mat with a natural rubber base and a recycled PET microfiber top specifically to solve this. The grip is moisture-activated, meaning it actually becomes more supportive as your palms get warm. Having a reliable surface allows you to focus on your alignment rather than worrying about your hands sliding away from you. Explore the yoga mat collection to compare options for your practice.
Quick Answer: A beginner yoga sequence should follow a natural progression from grounding and gentle warm-ups to standing strength poses, followed by seated stretches and a final rest. Moving in this "arc" prevents injury and ensures a balanced experience for both the body and mind.
Phase 1: Grounding and Centering
Easy Pose (Sukhasana)
The word asana translates to "seat" or "posture," and Sukhasana is the quintessential starting point. It is a cross-legged seated position that encourages a tall spine and a quiet mind.
- How to do it: Sit in the center of your mat with your legs crossed at the shins. If your knees are higher than your hips, sit on a Cork Yoga Block or a folded blanket to tilt your pelvis forward. This relieves pressure on the lower back.
- The Focus: Rest your hands on your knees and close your eyes. Take five deep breaths, feeling your ribs expand in all directions.
Cat-Cow (Marjaryasana-Bitilasana)
This is a gentle vinyasa—a term that describes movements synchronized with the breath. It wakes up the entire length of the spine and moves the shoulders and hips.
- How to do it: Move to your hands and knees in a tabletop position. Ensure your wrists are under your shoulders and knees are under your hips.
- Cow Pose: As you inhale, drop your belly toward the mat, lift your chest, and look slightly upward.
- Cat Pose: As you exhale, round your back toward the ceiling, tuck your chin to your chest, and pull your belly button in.
- Repeat: Cycle through these two shapes 5 to 8 times, letting your breath lead the movement.
Phase 2: Building Gentle Heat
Child’s Pose (Balasana)
This is the most important pose in any beginner’s toolkit because it is your "reset button." Whenever a sequence feels too intense, you can always return here.
- How to do it: From tabletop, touch your big toes together and spread your knees wide. Sink your hips back toward your heels and rest your forehead on the mat.
- The Focus: Extend your arms forward or rest them by your sides. Breathe into your back body, feeling your spine lengthen.
Downward-Facing Dog (Adho Mukha Svanasana)
Perhaps the most recognizable shape in yoga, this pose is an "inverted V" that stretches the hamstrings and strengthens the upper body.
- How to do it: From tabletop, tuck your toes under and lift your hips high toward the ceiling. Keep a generous bend in your knees at first.
- Alignment Tip: Press firmly into your palms and knuckles. Imagine you are pushing the mat away from you. Your heels do not need to touch the floor; the goal is a long, straight spine.
- The Focus: Hold for 5 breaths, letting your head hang heavy between your arms.
Phase 3: Standing Poses and Strength
Mountain Pose (Tadasana)
While it may look like just "standing," Tadasana is the foundation for all standing poses. It teaches us how to ground through the feet and align the skeleton.
- How to do it: Walk your feet toward your hands and slowly roll up to standing. Stand with your feet hip-width apart and your arms at your sides, palms facing forward.
- The Focus: Feel the four corners of your feet pressing into the mat. Engage your thighs and reach the crown of your head toward the sky.
Warrior II (Virabhadrasana II)
This pose builds incredible leg strength and mental focus. It is a "power" pose that helps you feel capable and centered.
- How to do it: From standing, step your left foot back about three to four feet. Turn your left toes out so they are parallel to the short edge of the mat. Bend your right knee until it is stacked over your right ankle.
- Arms and Gaze: Reach your arms out to the sides at shoulder height. Turn your head to look over your front middle finger. This focal point is called a drishti.
- The Focus: Keep your torso centered over your hips. Hold for 3 to 5 breaths, then repeat on the other side.
Tree Pose (Vrksasana)
Balance is a skill that we build over time. Vrksasana helps improve stability and quiet the internal chatter of the mind.
- How to do it: From Mountain Pose, shift your weight into your right foot. Place the sole of your left foot on your right ankle, shin, or inner thigh. Avoid placing the foot directly on the knee joint.
- Support: Bring your hands to your heart in a prayer position. If you feel wobbly, keep your left toes touching the mat like a kickstand.
- The Focus: Find one unmoving point on the floor or wall to look at. This helps your brain stabilize your body.
Key Takeaway: Using props like blocks and straps is not a sign of being a "beginner"—it is a sign of an advanced practitioner who understands their body's unique alignment. Props help bring the floor to you, preventing strain and allowing for deeper breath.
Phase 4: Release and Cool Down
Standing Forward Fold (Uttanasana)
After building heat, we begin to transition into poses that calm the nervous system. Forward folds are naturally cooling and introspective.
- How to do it: From Mountain Pose, exhale and hinge at your hips to fold forward. Keep your knees bent as much as you need so your chest can rest near your thighs.
- The Focus: Let your arms hang or grab opposite elbows. Shake your head "yes" and "no" to release tension in the neck.
Cobra Pose (Bhujangasana)
This gentle backbend strengthens the back muscles and opens the chest, which is especially helpful if you spend a lot of time sitting at a desk.
- How to do it: Lie on your belly with your legs extended. Place your hands under your shoulders with elbows tucked in close to your ribs.
- The Movement: Inhale and gently lift your chest off the mat using your back muscles. Keep your gaze down to protect your neck.
- The Focus: Press the tops of your feet into the mat. Do not try to push yourself too high; a "Baby Cobra" is perfect for beginners.
Reclining Twist (Supta Matsyendrasana)
Twists are often described as a "rinse" for the spine. They help neutralize the back after the movement of a sequence.
- How to do it: Lie on your back and hug your knees into your chest. Let both knees fall over to the left side while you keep your right shoulder grounded on the mat.
- The Focus: Extend your right arm to the side and look toward your right hand. Take 5 slow breaths here, then switch sides.
Phase 5: Final Integration
Corpse Pose (Savasana)
This is the most important part of the sequence. It is the moment where you do nothing and allow your body to absorb the work you have done.
- How to do it: Lie flat on your back. Let your feet splay open and rest your arms at your sides with palms facing up.
- The Focus: Close your eyes. Soften your jaw, your forehead, and your shoulders. Stay here for at least 2 to 5 minutes. If your lower back feels tight, place a Yoga Bolster or a rolled-up towel under your knees.
| Pose Name | Key Benefit | Beginner Tip |
|---|---|---|
| Cat-Cow | Spinal mobility | Move with your breath, not against it |
| Downward Dog | Full-body stretch | Keep knees bent to prioritize a flat back |
| Warrior II | Leg strength | Ensure front knee doesn't collapse inward |
| Savasana | Stress reduction | Use a blanket to stay warm as body temp drops |
Making the Most of Your Practice Gear
When you are starting out, you might wonder if specialized gear is truly necessary. While you can practice in any comfortable clothing, having a mat that supports your specific needs makes a difference in your consistency. For many beginners, joint sensitivity is a common hurdle. Our Infinity Mat offers extra-thick cushioning to protect knees and wrists, while the Combo Mat is the ultimate choice for anyone who finds themselves getting a little sweaty during the standing poses.
We also highly recommend incorporating a Yoga Strap into your routine. If you cannot reach your feet in a seated forward fold, a strap acts as an extension of your arms. This allows you to maintain a safe, straight spine while still experiencing the benefits of the stretch. Using high-quality, sustainable tools is an investment in your well-being. At YDL, we ensure our props are made from eco-conscious materials like natural cork and recycled plastic bottles, so you can feel as good about your gear as you do about your practice. Explore our sustainability commitment to learn more about these values.
Building a Consistent Routine
The key to seeing progress in your yoga journey is not the intensity of a single session, but the consistency of many. You do not need an hour every day to feel the benefits.
- Start Small: Even 10 minutes of Cat-Cow and Child's Pose in the morning can change the trajectory of your day.
- Listen to Your Body: Some days you will have the energy for Warrior II, and other days your body will ask for a long Savasana. Both are valid practices.
- Use the Right Tools: If you are unsure which mat or prop suits your style, take the Mat Quiz to help you find your perfect match.
- Be Patient: Flexibility and strength are side effects of yoga, not prerequisites. Everyone on a mat was once a beginner.
Bottom line: A simple sequence of yoga poses for beginners focuses on spinal health, foundational strength, and conscious breathing. By prioritizing alignment over depth and using props for support, you create a safe and sustainable practice.
Conclusion
Starting a yoga practice is an act of self-care that pays dividends in both physical health and mental clarity. By following this simple sequence of yoga poses for beginners, you are building a foundation that will serve you for years to come. Remember that every time you roll out your mat, you are choosing to show up for yourself.
Yoga Design Lab was founded in 2014 by Chad Turner with the goal of creating gear that is as beautiful as it is sustainable. We believe that when your mat is a work of art and your props are ethically made, you feel more inspired to practice. Whether you are using a Cork Yoga Wheel to open your chest or resting on a recycled microfiber Combo Mat, our mission is to support your journey with gear that blends high-performance functionality with stunning design. Learn more about how Yoga Design Lab began.
Take the first step today by exploring our collections or taking the Mat Quiz to discover the best tools for your new routine.
FAQ
How long should a beginner yoga sequence be?
A beginner sequence can be anywhere from 10 to 30 minutes long. The most important factor is consistency rather than duration, so choose a length that you can realistically fit into your daily schedule. Even a short 10-minute flow of five basic poses can help improve flexibility and reduce stress.
Do I need to be flexible to start yoga?
No, flexibility is a result of practicing yoga, not a requirement to start. Most beginners find that their range of motion increases over time as they move through foundational sequences. Using props like blocks and straps can also help you find proper alignment regardless of your current flexibility level. For more ideas, explore this guide to modified yoga poses for beginners.
How many times a week should I practice yoga as a beginner?
Starting with 2 to 3 sessions per week is a great goal for most beginners. This allows your body time to recover and adapt to the new movements while still building the muscle memory needed for progress. As you become more comfortable, you might choose to incorporate shorter daily sessions for mental clarity.
What should I do if a pose feels painful?
Yoga should never feel painful; if you experience sharp or pinching sensations, ease out of the pose immediately. It is normal to feel "sensation" or a deep stretch, but pain is a signal to stop. Always prioritize your safety by using modifications or returning to a resting shape like Child's Pose.


